

Composite materials can be difficult to finish cleanly. Carbon fibre, glass fibre and resin-based composite parts are strong and lightweight, but poor tool choice can quickly lead to chipped edges, visible witness marks, overheating, gouging or scrap components.
This guide explains how to deburr, remove flashing, blend edges and polish surface marks on composite parts using professional finishing tools. It is based on practical testing with RODA unitised points, diamond points, carbide burrs, felt polishing points and polishing compound.
The key is choosing the right tool for the level of material removal required. A tool that works well for heavy flashing may be far too aggressive for blending, while a safer fine-finishing tool may not remove larger burrs efficiently.
Composite Finishing:
Quick Tool Selection Guide
Important: These are surface speed recommendations, not universal machine RPM settings. The correct RPM depends on the diameter of the tool being used.
1.
Light Deburring on Composite Edges
For a typical composite edge with light burrs or minor edge roughness, the aim is to smooth the edge without cutting too aggressively into the part.
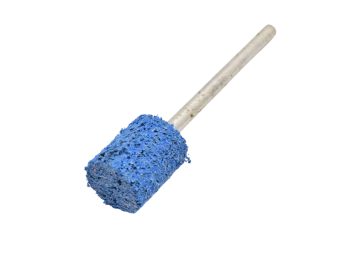
The recommended starting point is a RODA Fine Grey Unitised Point running at approximately 7–8 m/s surface speed.
This fine unitised abrasive leaves a smooth finish while reducing the risk of accidentally removing too much material. The fine grade gives the operator more control, making it a safer option for standard composite edge deburring.
In testing, one RODA Fine Grey Unitised Point could typically deburr approximately 7–8 metres of composite edge, depending on the burr size, pressure and part geometry.
Shop RODA Unitised Points for Composite Edge Deburring

Abrasive Points & Burrs
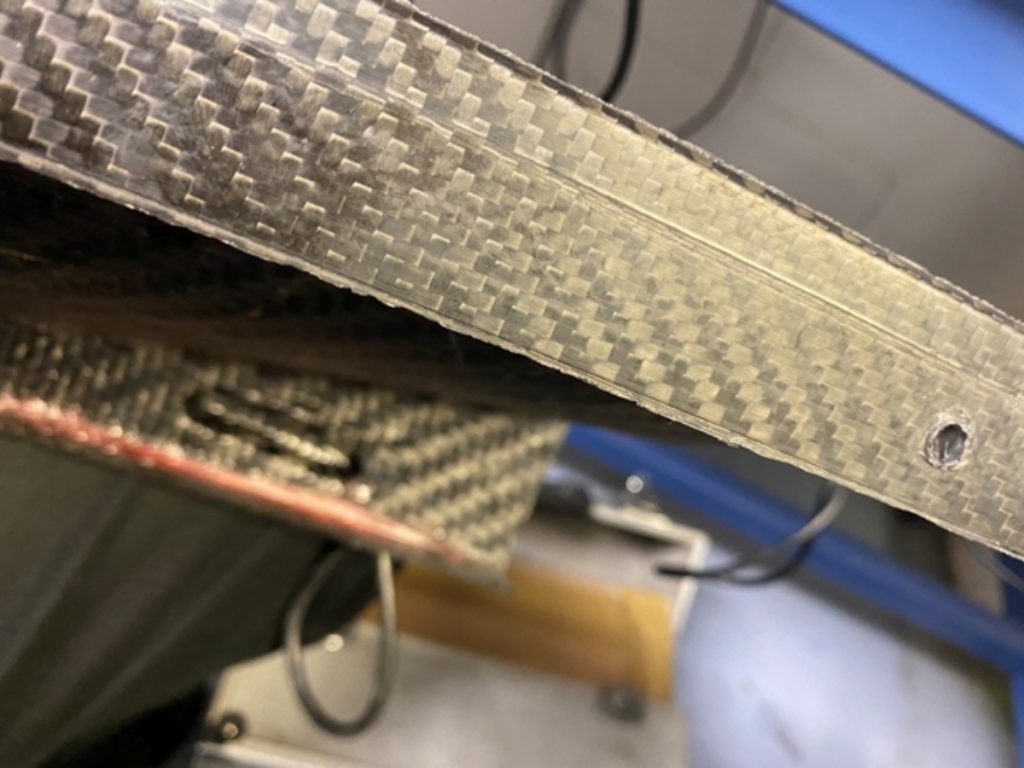
Typical composite edge before deburring
2.
Blending Worked Areas After Deburring
After removing a burr, the worked area may need to be blended back into the surrounding edge. This is especially important if a more aggressive tool has been used first.
For blending, the RODA Fine Grey Unitised Point should be run slower, at around 4–5 m/s surface speed.
At this lower speed, the tool can polish out small scratches and soften the transition between the reworked edge and the original surface. However, there is an important limitation: blending may still slightly highlight the worked area, so it can remain visible on the final part.
This makes the grey unitised point useful for controlled blending, but operators should test first where cosmetic appearance is critical.
3.
Flattening Burrs That Need More Cutting Action
Some burrs require more than a fine finishing point. If the burr needs a degree of flat grinding or levelling before final finishing, the better option is a RODA Vortex Blue Unitised Point.
Run the blue Vortex point at approximately 7–8 m/s for controlled burr flattening.
This tool has more material removal capability than the grey fine unitised point, so it is better suited to burrs that need to be levelled down before final blending.
However, it should not be treated as a general-purpose blending tool. For blending or scratch removal, the blue Vortex point is usually too aggressive and can leave the worked area more visible.
Shop RODA Unitised Points for composite burr removal and edge finishing
Abrasive Points & Burrs
4.
Removing Heavier Flashing from Composite Parts
For heavier flashing, the RODA Vortex Blue Unitised Point can be used at a higher surface speed of around 8–10 m/s.
At this speed, the tool gives stronger cutting action and removes material more efficiently. This makes it useful where moulded composite parts have heavier excess material around the edge.
Because the tool becomes more aggressive at higher speeds, it should be used with care. It is best reserved for edge work and flashing removal, not final cosmetic finishing.
5.
Removing Extremely Heavy Burrs with Diamond Points
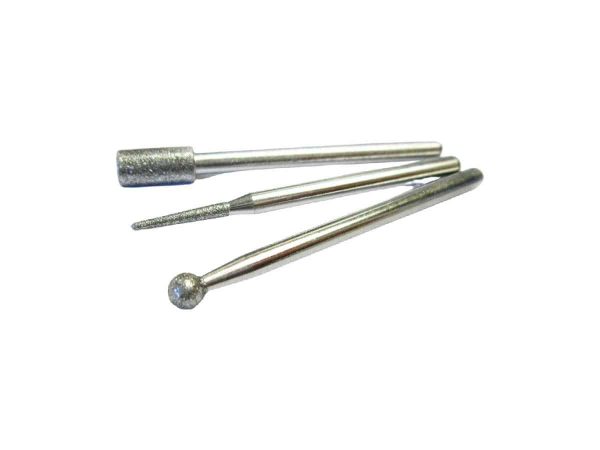
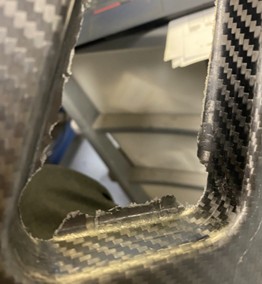
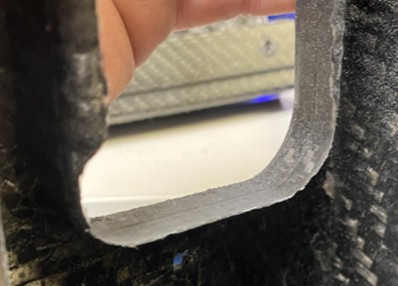
Where a composite part has an extremely heavy burr, a unitised point may not remove material quickly enough. In this situation, a 5mm cylinder diamond point can be used.
A 5mm cylinder diamond point running at around 10 m/s gives very fast stock removal. In the original testing, a heavy section was removed in approximately 5 seconds, which shows how quickly this tool can cut.
That speed is useful, but it also creates risk. Diamond points should be used carefully, with controlled pressure and a steady hand, especially on expensive or finished composite components.
Once the heavy burr has been removed, the area can then be blended using the RODA Fine Grey Unitised Point at 7–8 m/s.
Shop Diamond Points for heavy burr removal
Heavy burr before removal
Heavy burr after removal
6.
Using Carbide Burrs for Heavy Burrs and Flashing
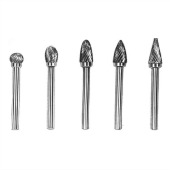
A 3mm diameter double cut carbide burr can also be used to remove heavy burrs and flashing from composite parts.
In testing, this was successful at approximately 6 m/s surface speed. The double cut burr gives strong material removal and can be useful where access is limited or where a smaller tool is needed.
However, carbide burrs carry a specific risk on composite parts: the flutes can catch and cut into the component. If this happens, the part may be damaged beyond repair.
For that reason, carbide burrs should only be used where the operator has enough control and visibility to avoid gouging the part.
Shop Carbide Burrs for precision material removal
7.
Removing Scratches and Surface Marks from Composite Parts
For surface scratches, handling marks or cosmetic recovery, the process needs to be much less aggressive.
The recommended setup is a RODA Felt Point used with an Apollo Polish Bar, running at approximately 3–4 m/s surface speed.
This combination is better suited to face work and cosmetic improvement rather than edge grinding. The felt point carries the polishing compound and allows the surface to be refined without the aggressive cutting action of a burr, diamond point or blue unitised abrasive.
This is the preferred option where the goal is to improve the appearance of the composite surface rather than reshape or deburr the part.
Shop Roda Mounted Felt Bobs for polishing composite surfaces
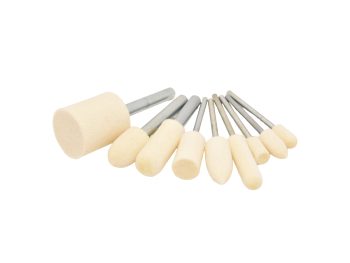
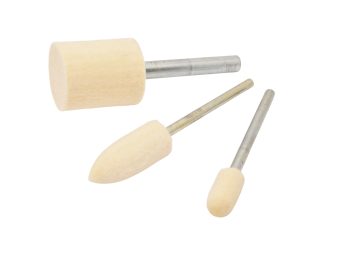
Mounted Felt Bobs & Points
Shop Apollo Polishing Bar for scratch and mark removal


Abrasives
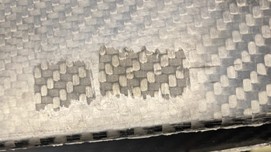
Surface mark before polishing
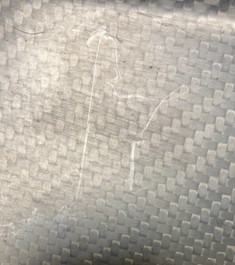
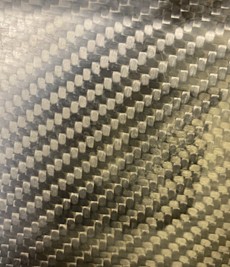
Surface mark after polishing
Common Mistakes When Finishing Composite Materials
Using an aggressive tool too early
A diamond point, carbide burr or blue Vortex unitised point can remove material quickly, but that is not always an advantage. If the burr is light, start with the least aggressive tool that will do the job.
Using the same speed for every process
Deburring, blending and polishing should not all be carried out at the same speed. For example, the grey unitised point works well at 7–8 m/s for edge deburring, but should be reduced to 4–5 m/s for blending.
Trying to blend with a tool designed for cutting
The blue Vortex point is useful for flattening and heavier flashing, but it is too aggressive for scratch removal or final blending.
Ignoring cosmetic witness marks
Even when scratches are polished out, the worked area may still be visible. This is especially important on exposed carbon fibre or cosmetic composite components.
Best Practice Workflow
For most composite deburring and finishing jobs, use the following sequence:
- Assess the burr or defect. Decide whether it is light edge roughness, heavy flashing, a raised burr, or a surface mark.
- Start with the least aggressive suitable tool. Use the grey unitised point for standard deburring where possible.
- Step up only when needed. Move to the blue Vortex point, diamond point or carbide burr only if the burr requires more cutting action.
- Blend the worked area. Use the grey unitised point to refine the transition after heavier material removal.
- Polish cosmetic surfaces separately. Use a felt point and Apollo polish bar for scratch and surface mark removal.
- Test on scrap or a non-critical area first. Composite layups and resin systems can behave differently, so always validate the process before production work.
Need Help Choosing the Right Composite Finishing Tool?
Composite parts vary depending on the resin system, fibre structure, edge condition and required finish. If you are working on a production process, trying to reduce scrap, or unsure which abrasive tool is safest for your application, Moleroda can help recommend a suitable deburring, blending or polishing process.
Contact the Moleroda technical team for advice on composite deburring, flashing removal, scratch removal and surface finishing.
Frequently Asked Questions (FAQs)
For light edge deburring, a Roda Fine Grey Unitised Point is usually the best starting point. It gives a smooth finish while reducing the risk of heavy stock removal.
For standard edge deburring with a Roda Fine Grey Unitised Point, use approximately 7–8 m/s surface speed. For blending, reduce this to around 4–5 m/s.
Yes, but with care. A 3mm double cut carbide burr can remove heavy burrs and flashing, but the flutes can catch and cut into the part, potentially causing scrap.
For heavier flashing, a Roda Vortex Blue Unitised Point can be used at around 8–10 m/s. It offers stronger material removal but is too aggressive for final blending.
For scratch and surface mark removal, use a Roda Felt Point with an Apollo Polish Bar at approximately 3–4 m/s surface speed.