
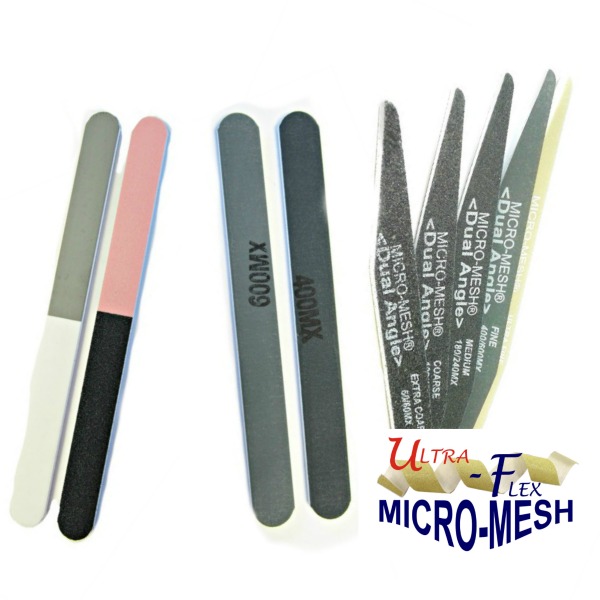
Micro-Mesh is one of the best tools for repairing and polishing acrylic. Its cushioned, flexible design and ultra-fine grits let you remove scratches without clouding or overheating the surface — producing a clear, mirror-like finish. This guide shows you exactly which Micro-Mesh grades to use, the wet-sanding workflow, and pro tips to avoid common mistakes.
Understanding Acrylic: Properties & Challenges
Acrylic — often sold under names like Perspex®, Plexiglas®, Lucite®, or Acrylite® — is a lightweight, transparent plastic that offers excellent optical clarity and impact resistance. It’s widely used for windows, displays, aquariums, and even aircraft components.
However, while acrylic is stronger and lighter than glass, it’s much more prone to surface scratching. Everyday contact with dust, paper, or cleaning cloths can leave fine marks that dull the surface. Fortunately, these scratches can be polished out — but only if the right abrasive is used.
Why Traditional Sandpaper Fails on Acrylic
Standard sandpapers are rigid and aggressive. When used on acrylic, they often create new scratches or generate heat that can distort the surface. That’s where Micro-Mesh, a cushioned abrasive system, outperforms every alternative.
Ultra-Fine, Cushioned Design Prevents New Scratches
Micro-Mesh uses a unique flexible backing that conforms to curves and edges, distributing pressure evenly. This eliminates harsh gouging and reduces the risk of heat damage or swirl marks.
Consistent, Controlled Cutting for Optical Clarity
Each Micro-Mesh grade contains precision-graded crystals that cut consistently and predictably, giving you total control from initial scratch removal to the final clear finish.
Long Lasting Abrasive That Works Wet or Dry
Micro-Mesh lasts 7–10 times longer than conventional abrasives and is designed for both wet and dry sanding — ideal for delicate materials like acrylic where temperature control and surface finish matter.
Learn more about Micro-Mesh’s unique engineering & how it works in Micro-Mesh – The Wonder Abrasive

Micro-Mesh: The Wonder Abrasive
Micro-Mesh is often called the wonder abrasive — and with good reason. Unlike traditional sandpaper, [...]
May
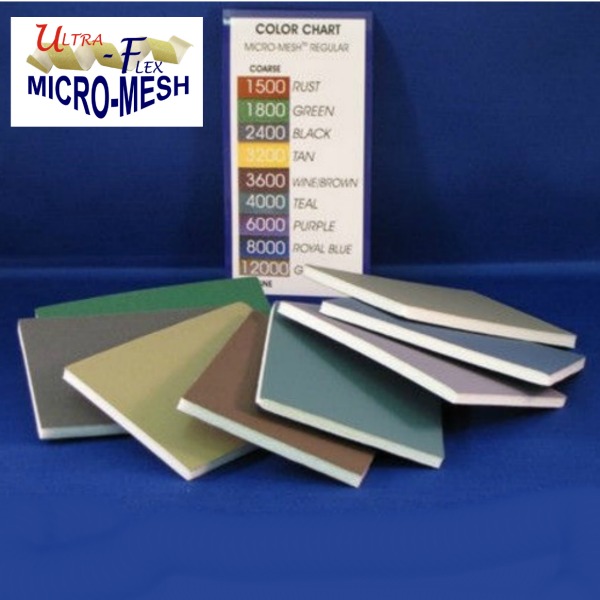
Recommended Micro-Mesh Grades
For scratch removal and polishing acrylic, use the following progression of grades:
1500 → 2400 → 3200 → 4000 → 6000 → 8000 → 12000
This ensures that each stage removes the marks left by the previous grit, leaving a flawless, optical-grade finish.
Tools & Supplies Checklist
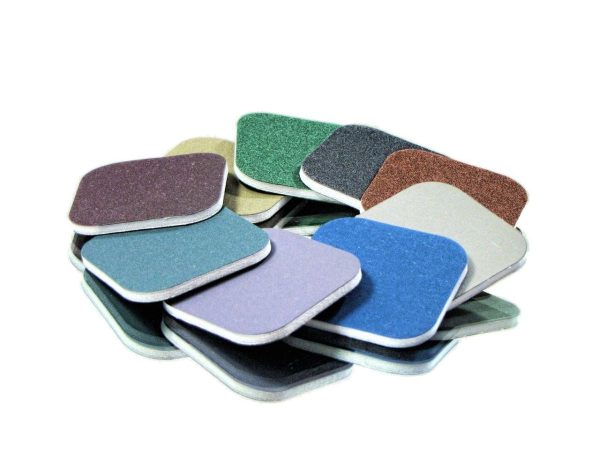
Abrasive Hand Pads
Micro-Mesh Soft Touch Pads Regular set of 9 pads for fine Sanding
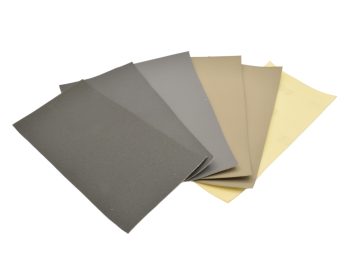
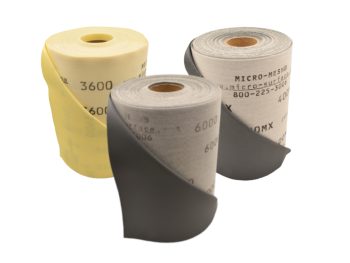
Abrasive Sheets & Rolls
Micro-Mesh Sheets – Individual Grades in Regular, MX & AO – 3″ x 6″ | 6″ x 6″ | 6″ x 12″
-
Water spray bottle (for wet sanding)


Micro-Mesh Accessories
Micro-Mesh Cotton Polishing Cloth | 12″ Square | 100% Cotton Flannel
- Micro-Mesh Liquid Compounds for final finish (optional)

-
Foam block or hand pad for flat surfaces
Step 1 - Clean the Acrylic Surface
Before sanding, wash the acrylic thoroughly with warm water and a mild detergent to remove dust and dirt. Dry with a soft, lint-free cloth.
Step 2 - Start Wet Sanding with Micro-Mesh
Re-wet the surface and the Micro-Mesh pad. Begin with your starting grit (usually 1500–2400 for moderate scratches). Sand using light, circular motions, keeping the surface wet to avoid heat buildup.
Step 3 - Work Through the Grit Progression
Move up gradually through each finer grit, rinsing and checking between stages.
Typical sequence: 1500 → 2400 → 3200 → 4000 → 6000 → 8000 → 12000.
By the final grit, the acrylic should appear evenly smooth and slightly glossy.
Step 4 - Final Polish for Crystal Clear Results
Buff the surface with the 8000 or 12000 grit, then wipe clean. For a glass-like shine, apply Micro-Mesh Finish Liquid or a plastic polish and gently buff with a soft cloth.
Step 5 - Rinse & Inspect
Rinse the surface with clean water, dry it, and inspect under bright light. If any dull spots remain, repeat the final fine grit stage until clarity is restored.
Keep Surfaces Wet to Prevent Heat Damage
Water acts as both a lubricant and a coolant, helping you achieve a smoother finish while avoiding melting or warping.
Use Light, Even Pressure
Let Micro-Mesh do the work. Too much pressure can cause uneven sanding or further scratching.
Don't Skip Grits - Progress Methodically
Each stage prepares the surface for the next finer grit. Skipping can leave micro-scratches that remain visible even after final polishing.
Practice on Scrap Acrylic First
If you’re new to Micro-Mesh, test your technique on a spare piece before working on your main project.
Still Cloudy After Polishing?
Use a finer grit or extend your polishing time with 8000–12000 grades to restore full transparency.
Deep Scratches?
Start with a coarser grade (1500) and spend more time at that level before moving up the sequence.
Streaks or Haze?
Make sure you rinse between each grit and always keep the surface wet.
Sheets & Rolls
Perfect for flat panels and large acrylic sheets. Available in full grit ranges for stepwise finishing.
Abrasive Sheets & Rolls
Micro-Mesh Sheets – Individual Grades in Regular, MX & AO – 3″ x 6″ | 6″ x 6″ | 6″ x 12″
Abrasive Hand Tools
Pads & Swabs
Ideal for hand-sanding small or curved acrylic parts, models, or edges.
Abrasive Hand Pads
Micro-Mesh Soft Touch Pads Regular set of 9 pads for fine Sanding

Abrasive Hand Tools
Flexifiles
Flexible tools for polishing curved or hard-to-reach areas like instrument covers or lenses.
Discs
Attach to orbital sanders or rotary tools e.g. Micromotors, Flex-shafts or standard drills for evenly finishing large acrylic panels or displays.

Kits
All-in-one Micro-Mesh polishing kits include the full grit sequence plus accessories for complete scratch removal.

Together, these guides form a complete library on how to select, use, and care for Micro-Mesh abrasives across different materials.
Micro-Mesh: The Wonder Abrasive
Micro-Mesh is often called the wonder abrasive — and with good reason. Unlike traditional sandpaper, [...]
May

Micro-Mesh Grits & Grades Explained
Which Micromesh grades will suit you? There are 4 types of Micro-Mesh stocked by Moleroda. [...]
Jun

Smoothing & Finishing Wood with Micro-Mesh
Do you have a wooden sculpture that needs finessing? Do you have a kitchen surface [...]
Apr
Polishing & Finishing Solid Surface Worktops with Micro-Mesh
Moleroda stocks a range of cushioned finishing abrasives, available in formats useful for both industrial [...]
Jul

How Violin Makers Use Micro-Mesh
How to polish violins and repair and restore using Micromesh abrasives. Approved for use on [...]
Oct
| Step | Micro-Mesh Grade | Purpose |
|---|---|---|
| 1 | 1500 | Remove visible scratches |
| 2 | 2400 | Smooth surface uniformly |
| 3 | 3200–4000 | Refine and prepare for polish |
| 4 | 6000–8000 | Pre-polish clarity stage |
| 5 | 12000 | Final optical polish |
TIP: Always use genuine Micro-Mesh abrasives from Moleroda to ensure consistent, professional-grade results.